Usually, the Custom Liquid section is available on your Shopify theme customization; however, if you cannot find it on the section list, you can follow the guide below to create Shopify Custom Liquid section for your theme.
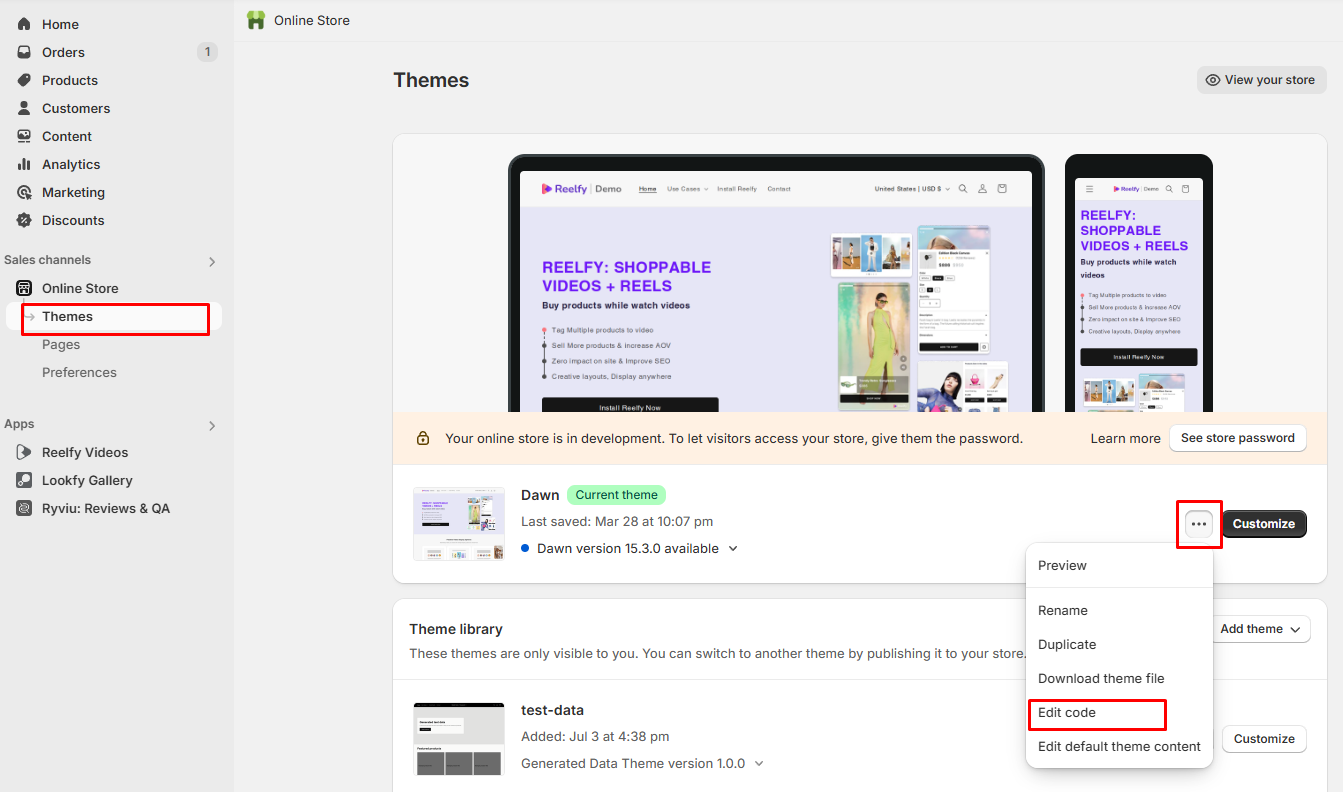
– In your Shopify admin panel, go to “Themes” below the “Online Store” section
– Click “Edit Code” in the dropdown menu next to the “Customize” button of the current theme
– Click Add a New Section and give it the name “custom-liquid-section” in the Sections directory.
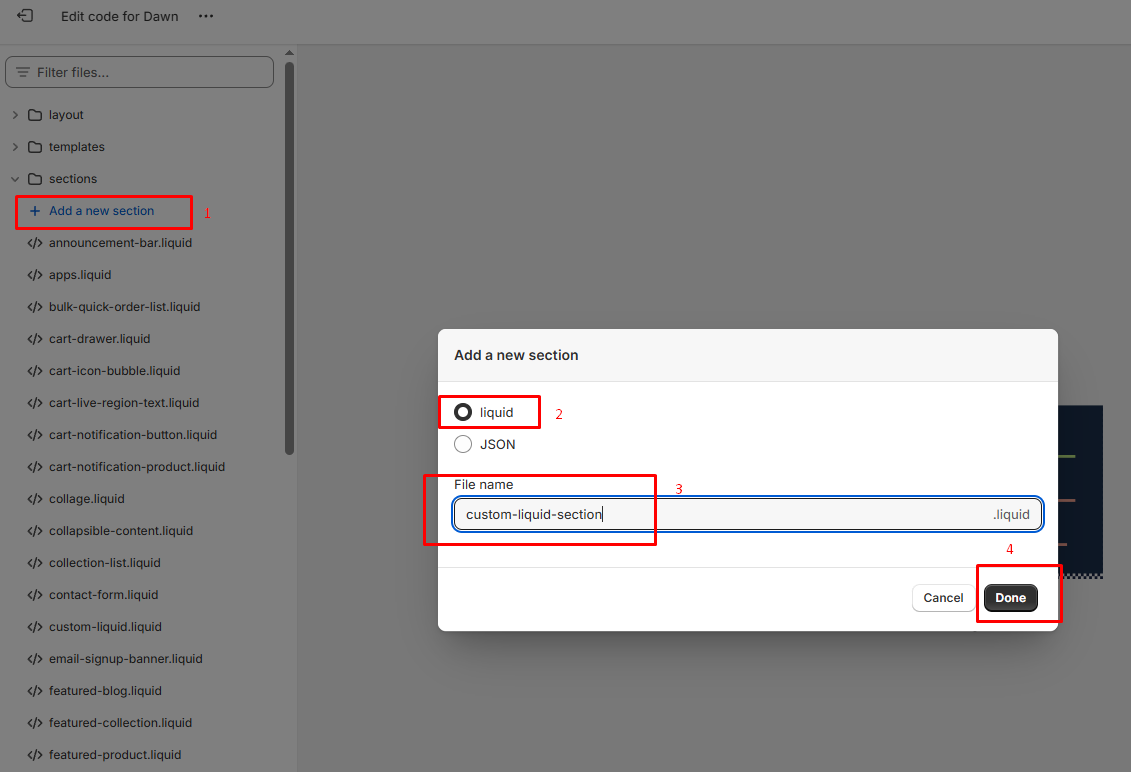
– Hit “Done”
(*)Note: If there is not option “Add a new section", after clicking to open the ‘sections’ folder, you can click on the ‘New File‘ icon" instead:
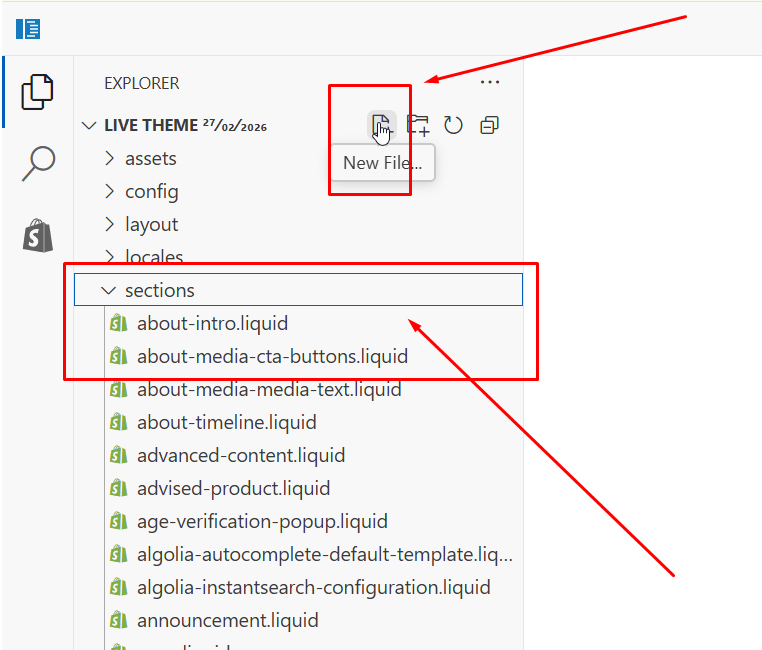
In this case, please do not forget the file extension. You must give new file the name “custom-liquid-section.liquid”.
– Add the code below to the section, and then choose “Save” on the right side.
{{ section.settings.custom_liquid }}
{% schema %}
{
   "name": "Custom Liquid",
   "settings": [
   {
      "type": "liquid",
      "id": "custom_liquid",
      "label": "Custom Liquid",
      "info": "Add app snippets or other liquid code to create advanced customizations."
   }],
   "presets": [
   {
      "name": "Custom Liquid"
   }]
}
{% endschema %}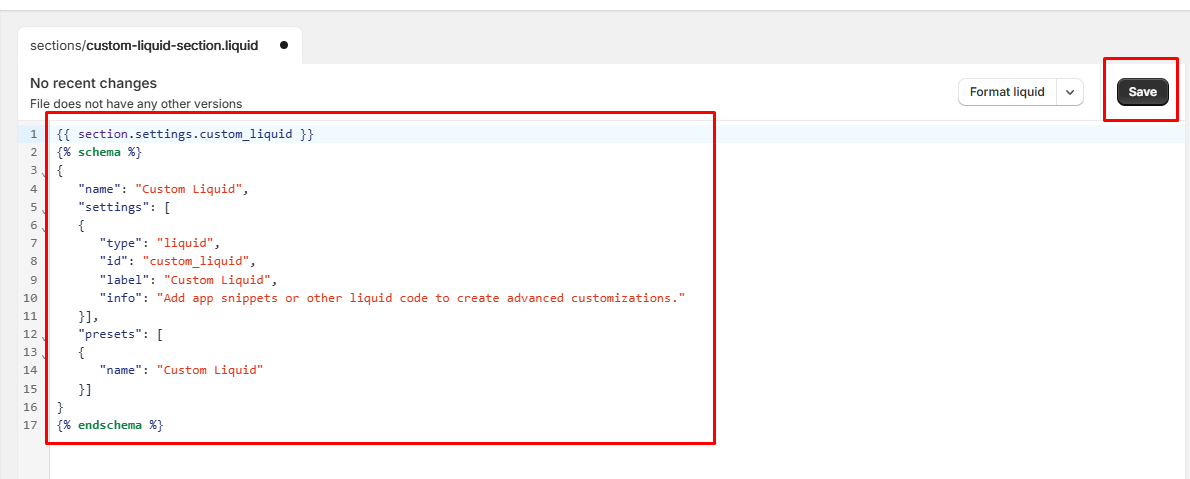
Now, the Custom Liquid section is available in your theme editor. Do step-by-step to add it to your Shopify theme.
– In your Shopify’s theme editor, open the page you want to add the “Custom Liquid” section, click “Add section”, navigate to “Custom Liquid” and select it.
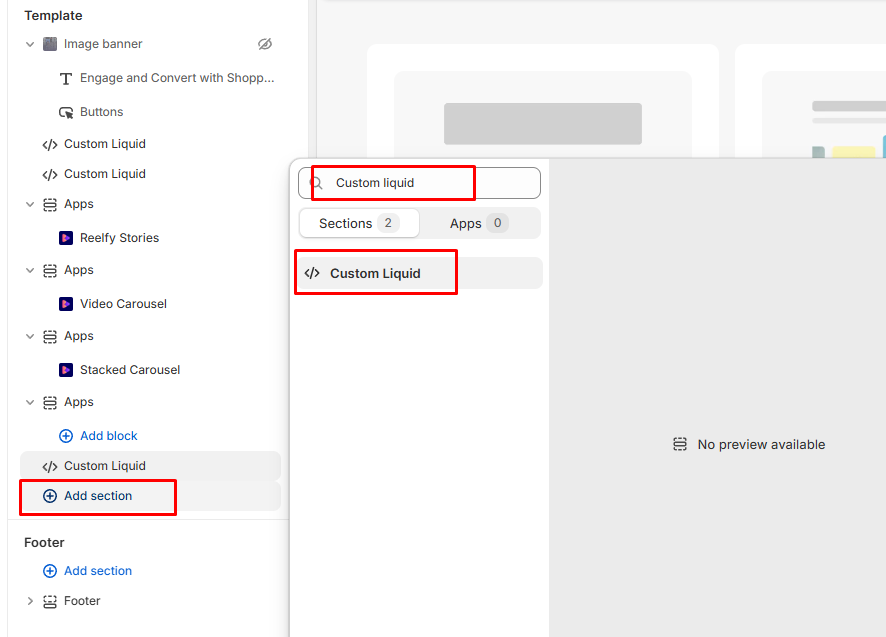
– Open the newly created Liquid section
– Add your Custom Liquid code to define the content and structure of the section. This can include HTML, CSS, and Liquid tags. Customize the section according to your design and content needs.
Finally, Hit the “Save” button to save and publish all your changes to your customers.